
Rapid Integration with Oracle APEX and Jasper4Oracle
This blog post will show, how to integrate the Jasper4Oracle-Server into Oracle APEX. The goal is to enable frictionless usage of J4O components within Oralce APEX during the developement process.
Requirements:
- Oracle Database Instance
- Installation of Oracle APEX with Version 21.1 at the lowest
- Installation of the J4O-PL/SQL-Client API (Installguide 3.3)
- Jasper4Oracle-Servers Instance on machine, that is reachable by the Oracle Database instance
Oracle APEX is known for its fast and hassle-free process of creating problem-oriented solutions. Whether one needs low-cost graphical interfaces for analysis or in-depth display of datapoints – Oracle APEX provides the means to implement these changes without much more effort.
After development and deployment of such application users often yearn for reporting solutions, that are more long-term oriented. This need cannot be met by the APEX provided components.
The Japer4Oracle-Server was created exactly for this purpose. It was developed to provide scalable and direct access to any of your Jasper-Reports from the comfort of your APEX workspace.
Configuration of the J4O-Packages
At first, we will replace the default implementation of the J4O package with our provided “TEAM_J4O_apex.pkb” version. The file containing this implementation can be found inside our release archive right beside the default implementation.
After installing the package body we are able to start configuring our Oracle APEX calls towards the J4O-Server. All calls from withing any APEX context will originated from the active applications parsing schema. The following procedure will be created inside the aforementioned schema:CREATE OR REPLACE PROCEDURE “SETUP_J4O” IS BEGIN TEAM_J4O.SETUP_CREDENTIALS(P_DB_SERVER => ‘IP or DNS’, P_DB_PORT => 1521, P_DB_SERVICE => ‘SOCO’, P_USERNAME => ‘HR’, P_PASSWORD => ‘HR’, P_J4O_SERVER => ‘IP or DNS’, P_J4O_PORT => 8099, P_J4O_PROTOCOL => ‘HTTP’ ); END SETUP_J4O;
This procedure will be automatically executed each time the TEAM_J4O package is used. Alternatively, one can use the procedure “TEAM_J4O.SETUP_CREDENTIALS” from within other contexts to create more precise configurations.
The first five parameters define the database connection, which will be used by the J4O-Server to create any report. This may be the database, that contains and runs APEX, or any other database reachable by the J4O-Server. Any given IP or DNS name must be defined from the perspective of the J4O-Server; e. g. “localhost” may only be used, if the J4O-Server is running on the same machine as the APEX database.
The following three parameters (Prefix “P_J4O_”) define the J4O-Server’s location. In addition, these properties will be used to generate links for the end users. Thus, the machine running the J4O-Server must be reachable by any client machine.
Installation of the J4O-Komponenten
Our J4O-Releases contain APEX plugins for Dynamic Actions, Processes and Regions. Each of these components is provided as a ready-to-import SQL script inside the subfolder “apex”. All our components are independent of one another and can be deployed when needed.
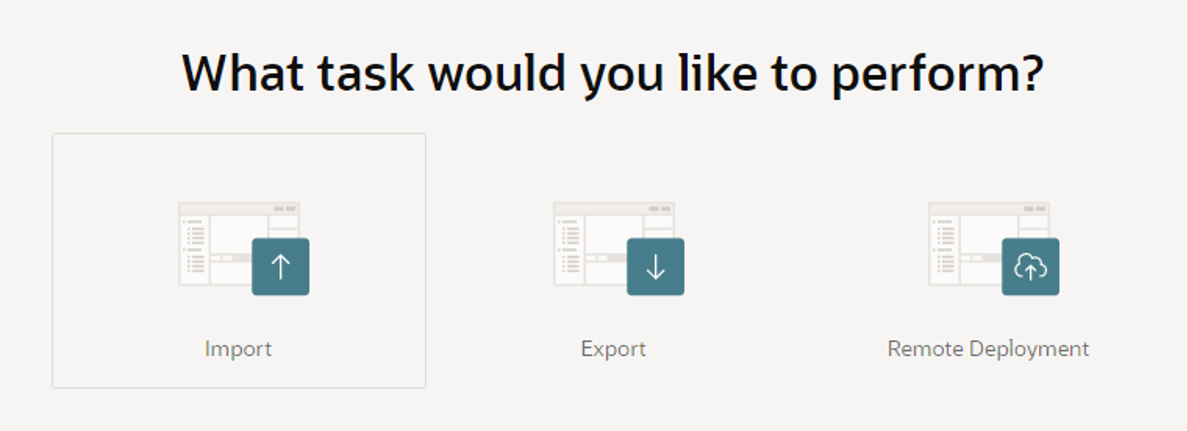
Navigate to the overview page of an application and click on the tile “Export/Import”:
Hier wählen wir „Import“ aus. Darauffolgend laden wir die gewünschte Komponentendatei hoch und wählen „Plug-in“ aus. Nach dem Durchklicken des Dialogs steht die jeweilige Komponente auf jeder Seite der Applikation zur Verfügung.
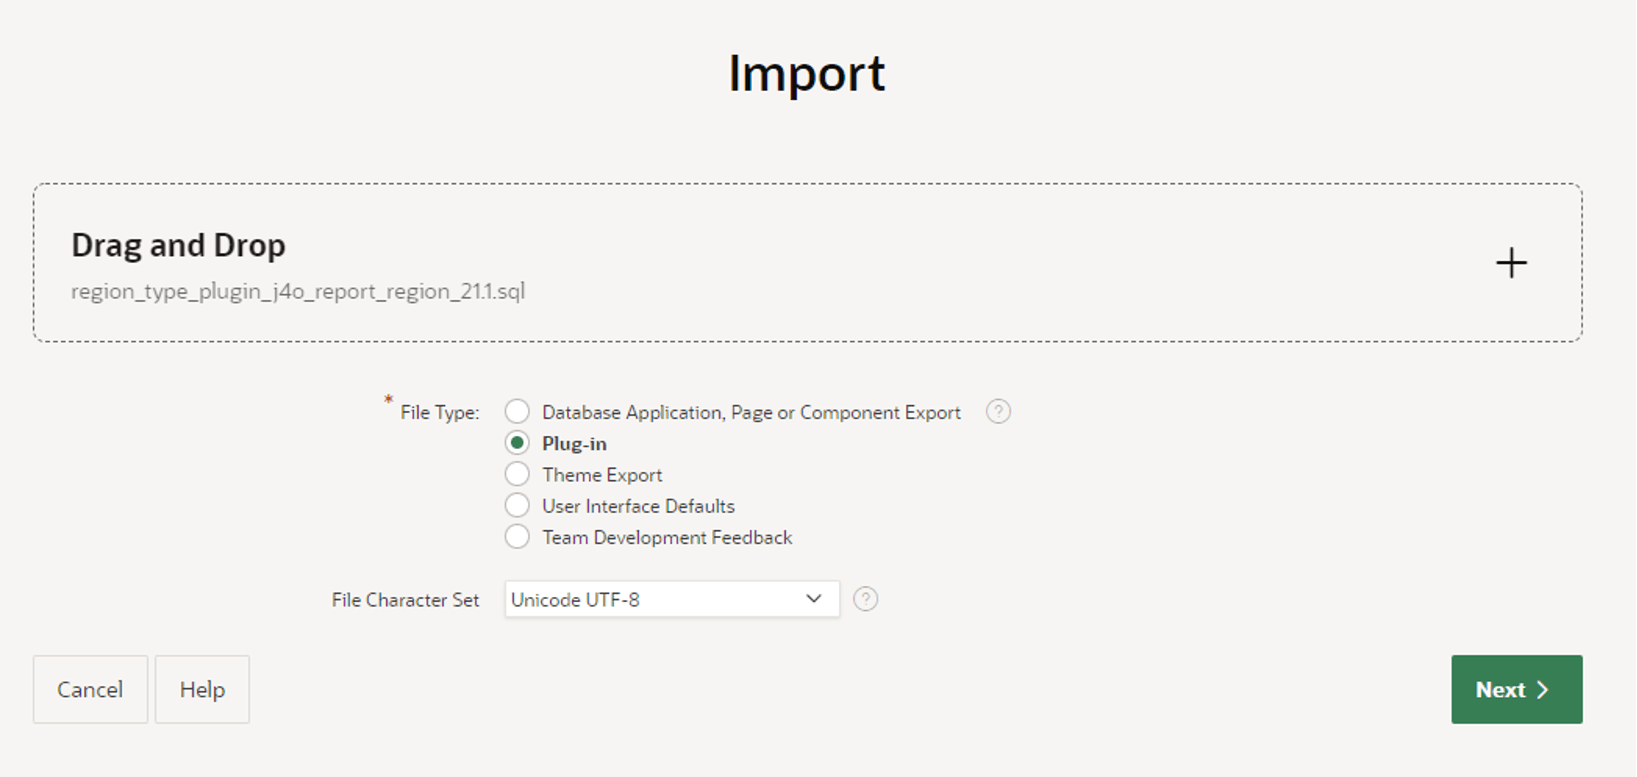
Select “Import”, upload the desired component’s file and select “Plug-in”. After following the dialog the component is ready for use in any page of the application.
Updateable Region
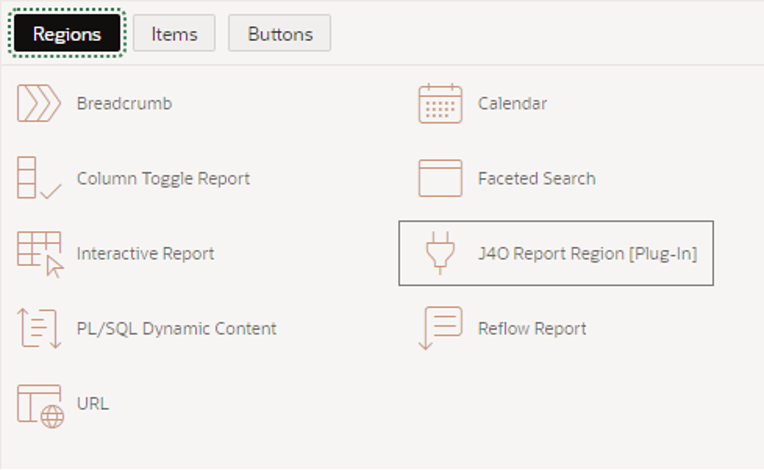
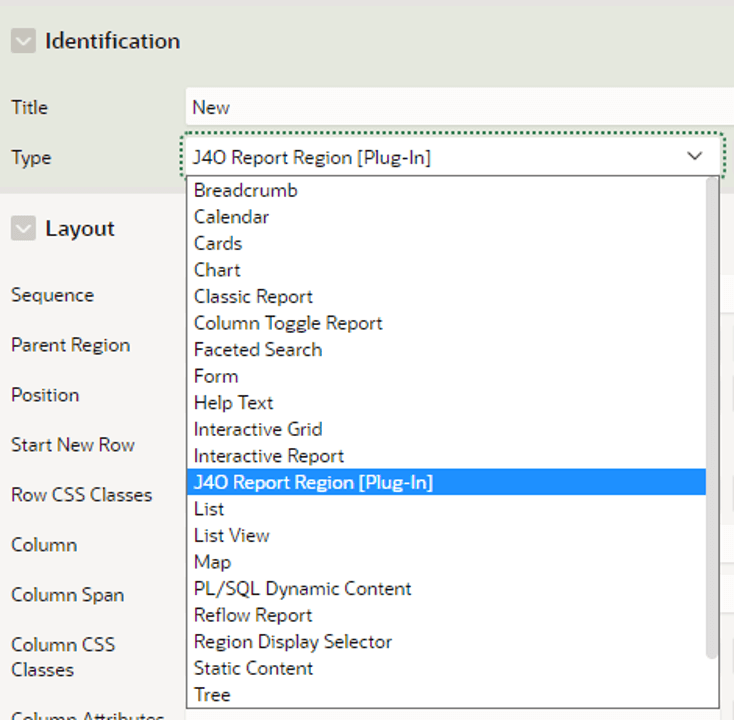
The region component is provided with the file „apex/apex_21_1/region_type_plugin_j4o_report_region_21.1.sql“. After importing the plugin, one can change the type of any region to the “J4O Report Region [Plug-in]”.
The region’s attributes define, which report is being displayed. This blog uses the provided “J4O_installation_test“ report for testing purposes.
Furthermore, we created a text field “P2_ITEM” und changed the properties of our region as follows:
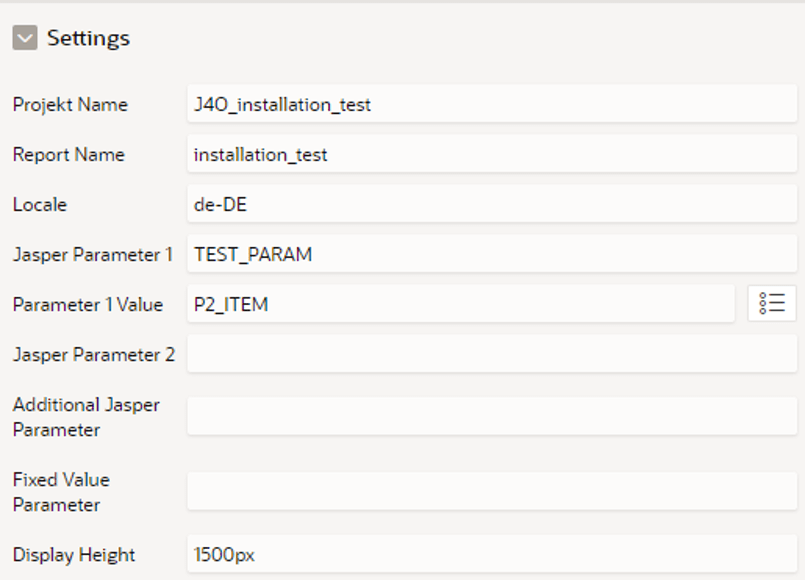
The “Projekt Name” property corresponds to the JAR archive’s name, which contains the deployed report.
The “Report Name” property corresponds to the JRXML filename, which is contained in said archive and is used as the starting point of a given report run.
The “Locale” property will be provided to the report run to format date, currency and other fields.
The report accepts a parameter “TEST_PARAM” which will be populated by providing its name inside “Jasper Parameter 1” and a field inside “Parameter 1 Value”.

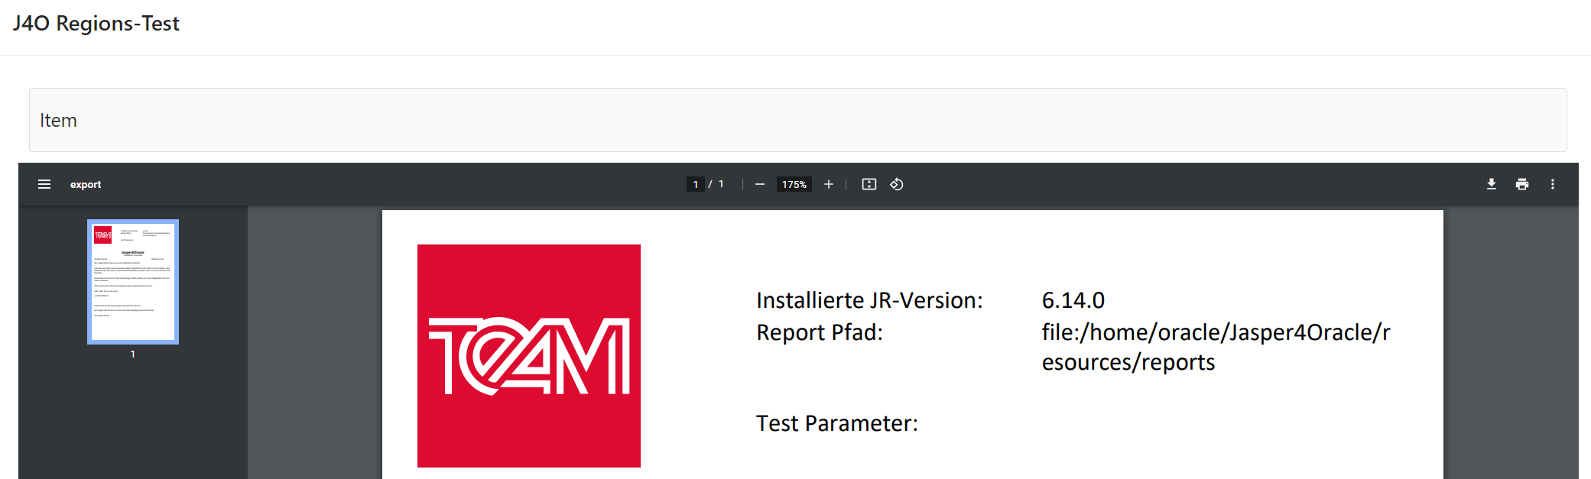
After entering any value into the “P2_ITEM” field, the report is not updated immediately. To achieve this, one needs to submit the page with “Enter”.
This is not an intuitive workflow. Adding to our current setup, we create a Dynamic Action to implement a seamless update:
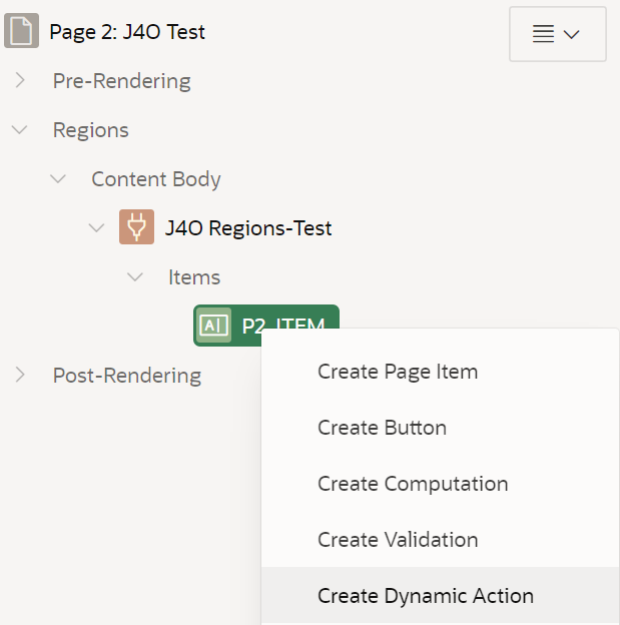
The Dynamic Action may be renamed as needed. The underlying action will be configured as follows. Do note that this Dynamic Action is a standard type and not the J4O provided type.

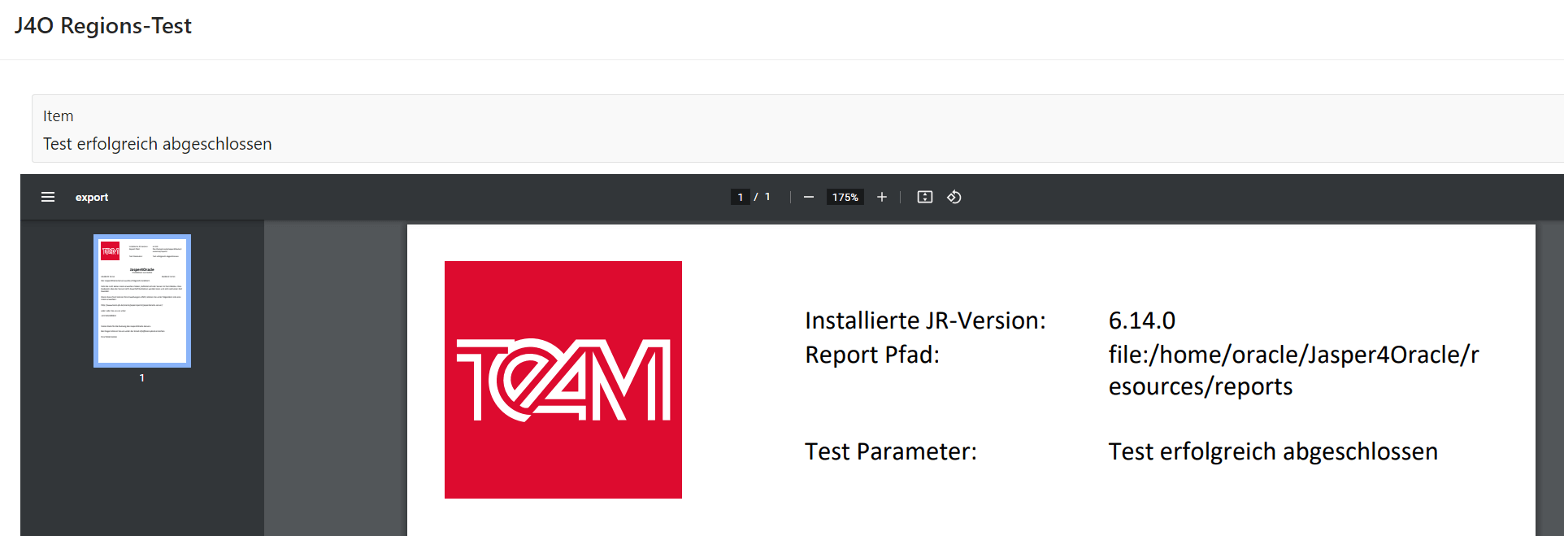
With these changes the region is being updated, each time an “OnChange” event is fired. This happens when one leaves the input field, for example with “Tab”.
Dynamic Action and Process
The source for the Dynamic Action component is located at „apex/apex_21_1/dynamic_action_plugin_j4o_print_report_da_21.1.sql“.
The source for the process component is located at „ apex/apex_20_2/ process_type_plugin_j4o_print_report.sql“.
After importing the component, it is ready for use in any page of the application like any other standard component:
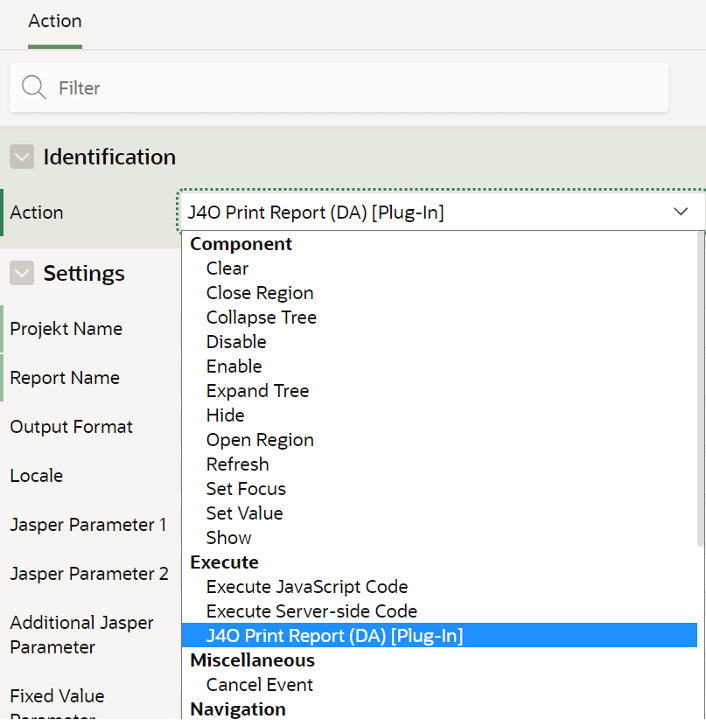
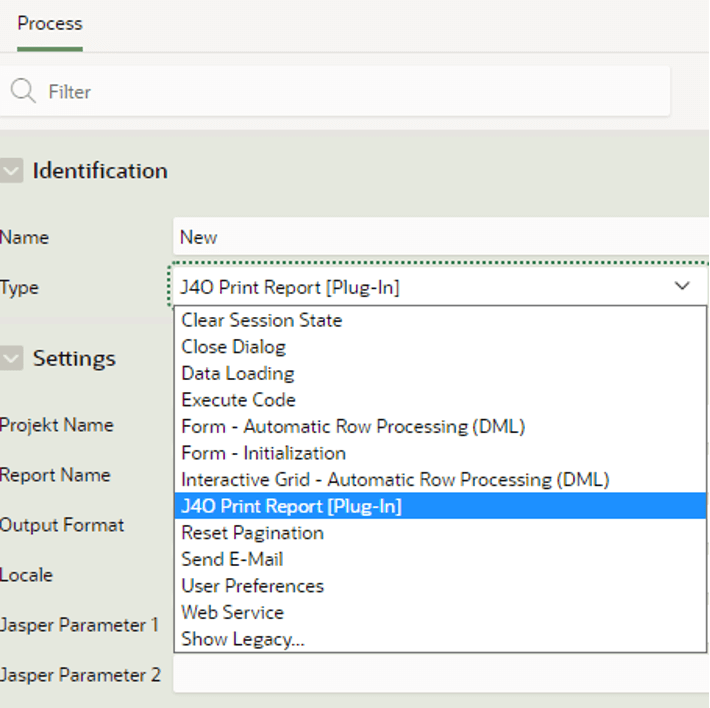
The configuration can be accessed directly under the subemenu “Settings” and it is analogous to the configuration of the region beforehand.
The default configuration will open a new window to display the report, when the process concludes.
This concludes this blog post showing, how to use our low-code APEX integration.
Thank you for your time and until next time.